

A seedbox is a dedicated server for downloading and uploading digital files. There are several possibilities when it comes to protocols, but this tutorial will teach you how to set up, configure and use a Debian server with the rtorrent bittorrent client.
The main reason why people get a seedbox is to upload large amounts of data. If you have access to a high-speed Internet connection that`s not in your house, you can administer the server`s uploads and downloads from home. If you set up a seedbox at home it can take care of all the torrenting and run day and night without wasting diskspace and resources on your main computer. Some private trackers have strict ratios, so you may have to seed the files for a long time to hit a decent ratio. This is where a seedbox comes in.
In this tutorial we`ll make a headless server running the very efficient rtorrent bittorrent client with screen for remote administration.
Requirements
1.Preferably a high speed internet connection
2.A computer (that we`ll use as server) with a big hard drive
3.A main computer running GNU/Linux, Windows or Mac OS to administer the seedbox
Since we are not installing a GUI, system requirements are very low. Just about any old computer will do:
CPU: 500 MHZ or higher is plenty for home usage
RAM: At least 64 MB, but 256 MB or more is recommended
HD: The install will use about 600 MB of diskspace + SWAP, but it is a good idea to give the OS more room to expand. A large HD with plenty of diskspace is obviously a good idea for sharing files
First you need the correct ISO. You only need CD1. http://www.debian.org/CD/http-ftp/#stable If you are on a DSL, it will be faster to use a netinstall. Your computer will get the files it needs from the Internet: http://www.debian.org/CD/netinst/
Burn the ISO to a blank CD and boot from it.
Installing the base system
Basic configuration
When the system boots, you`ll see the splash screen. Select graphical install or text-mode install.

Here is an example of a text mode install: http://www.youtube.com/watch?v=fmV1c6bcKb0
And here is an example of a graphical install: http://www.youtube.com/watch?v=sJuJbqxxhos
Select language, country and keyboard layout.


Now you need to choose a name for your server, e.g. «seedbox». You also need to put in the name of the network.


Next up is the partitioning. There are several ways of doing this, and the easiest is to use the entire hard drive, and this is recommended for beginners.


If you want a little more control, select manual partitioning. In this case we make three partitions:
/swap <---- temporary process memory image (size: 2xRAM)
/ <---- the main system (3 GB)
/home <---- config files and data storage (remaining diskspace)
Assuming that your drive is empty and without a partition table, you need to select it and hit enter. The installer will ask if we want to make a partition table. Select yes. We have now got a hard drive with free space to partition. Next, select “FREE SPACE” and hit enter.
The installer will now ask some questions. We are first going to create the swap partition. We make this twice the size of our RAM. (Of course if your server has 4 GB of RAM it will hardly need swap at all, so making an 8 GB swap partition will for the most part be a waste of diskspace. On a server with 64 MB of RAM, making a swap partition larger than 128 MB makes a lot of sense, because the less RAM you have, the more swap you need.)
In this case we make a swap partition with a size of 1000 MB. Select mountpoint, hit enter and change it to “swap area”. The rest of the settings for the swap partition should be Primary; Beginning of the drive; non-bootable.
Repeat the same for
/ (root): 3 GB; Primary; Beginning of the drive; filesystem “ext3”; Mountpoint / ; bootable
and finally
/home; (the remaining diskspace); Primary; Filesystem “ext3”; Mountpoint /home; non-bootable
After this you are done with the partitioning and can write the changes to the disk.
The installer will now install your base system.

You are now asked for a root password. Make sure this password is strong. Repeat the password to make sure there are no typos.


Next you must make a normal user account. In this case we call our user rtorrent. (It is important that you call the user rtorrent if you just want to copy and paste commands later on.) Choose a password and confirm.


Next you must configure apt. Choose a mirror geographically close to you.


Unless you want to use a proxy server, skip the next step.

Apt will now update the packages.


You will be questioned if you want to participate in the package survey. You can skip it by pressing no.

After this you have reached the package selection screen. Make sure you unmark ALL the checkboxes. We will install what we need later on.

When you are asked to install the GRUB boot loader on the master boot record, select yes.

The base system install is now complete. Remove the CD from the drive and hit continue to reboot the system.

Further base system configuration
You will be greeted by a black screen.

Log in using root as login and your root password.
First it is a good idea to edit your sources.list. This file decides where to look for updates. We don`t want to use the CD anymore since we are connected to the Internet on a DSL connection. Open the file with
Code: Select all
nano –w /etc/apt/sources.listDelete the top cdrom entries, so that your computer only looks for files on the Internet.
Your sources.list should look something like this:
Code: Select all
deb http://ftp.no.debian.org/debian/ squeeze main
deb-src http://ftp.no.debian.org/debian/ squeeze main

deb http://security.debian.org squeeze/updates main
deb-src http://security.debian.org squeeze/updates main

deb http://ftp.us.debian.org/debian/ squeeze-updates main
deb-src http://ftp.us.debian.org/debian/ squeeze-updates main
Save with Control+X, press y to confirm and press enter to overwrite the old /etc/apt/sources/list
Now update the sources with
Code: Select all
aptitude updateand install upgrades (if there are any) with
Code: Select all
aptitude safe-upgradeCode: Select all
aptitude install ssh openssh-serverCode: Select all
nano -w /etc/ssh/sshd_configRestart the SSH server for the new change to take effect
Code: Select all
/etc/init.d/ssh restartYou connect to the server using the following syntax: ssh user@host. Assuming that your server is located at 192.168.1.10, you can connect to it by typing
Code: Select all
ssh root@192.168.1.10You will now get logged in as root with all its power.
If you for some reason want to log in directly as user (rtorrent), you can do it like this:
Code: Select all
ssh rtorrent@192.168.1.10Static IP
If you are behind a router, some routers will give the computers behind them the same IP every time, based on their MAC addresses. If this is the case, you can skip this step. (My router is a Linksys WRT54G with dd-wrt, and it always gives the server the same IP.)
Because the Debian Lenny installer has configured our system to get its network settings via DHCP, we have to change that now because a server should have a static IP address. An IP address is pretty much like a phone number. (If you are calling someone often, you don`t want them to have a new phone number every time.)
First make a backup of the old config file. If something goes wrong, you can copy everything back with a simple commend.
Code: Select all
cp /etc/network/interfaces /etc/network/interfaces.bakCode: Select all
cp /etc/network/interfaces.bak /etc/network/interfacesCode: Select all
netstat –nrCode: Select all
nano –w /etc/network/interfacesLook for the line called “iface eth0 inet dhcp” to “iface eth0 static” and add the info from netstat to keep the current IP, and the result could be like this, assuming your router is 192.168.1.1 and you want your static IP to be 192.168.1.10:
Code: Select all
# The loopback interface
auto lo
iface lo inet loopback

# The primary network interface
auto eth0
iface eth0 inet static
       address 192.168.1.10
       netmask 255.255.255.0
       network 192.168.1.0
       gateway 192.168.1.1
When all this info is in place, press Control+x, y to save and enter to exit.
Then type
Code: Select all
/etc/init.d/networking restartCode: Select all
ping -c 3 google.comNow we are going to connect to the server. Open a console and type ssh root@the static ip address you just set, e.g.
Code: Select all
ssh root@192.168.1.10Installing and configuring rtorrent
Code: Select all
aptitude install rtorrent screen psmiscCode: Select all
nano -w /etc/init.d/rtorrentCode: Select all
#! /bin/sh
### BEGIN INIT INFO
# Provides: rtorrent
# Required-Start:
# Required-Stop:
# Default-Start: 2 3 4 5
# Default-Stop: 0 1 6
# Short-Description: rtorrent
# Description: start rtorrent
### END INIT INFO

case "$1" in
  start)
	echo "Starting rtorrent..."
    su rtorrent -c 'screen -dmS rtorrent rtorrent'
    ;;
  stop)
	echo "Stopping rtorrent..."
	killall -s 2 rtorrent
    ;;
  *)
    echo "Usage: $0 {start|stop}"
    exit 1
    ;;
esac

exit 0
Save and exit.
Make the script executable and create symlinks:
Code: Select all
chmod 755 /etc/init.d/rtorrentCode: Select all
update-rc.d rtorrent defaultsNow log in as user
Code: Select all
su – rtorrentCode: Select all
cp /usr/share/doc/rtorrent/examples/rtorrent.rc /home/rtorrent/.rtorrent.rcCode: Select all
mkdir /home/rtorrent/watch/

mkdir /home/rtorrent/session/

mkdir /home/rtorrent/download/
Open /home/rtorrent/.rtorrent.rc
Code: Select all
nano –w /home/rtorrent/.rtorrent.rcand add/change the following lines to this:
Code: Select all
directory = /home/rtorrent/download/

session = /home/rtorrent/session/

schedule = watch_directory,5,5,load_start=/home/rtorrent/watch/*.torrent
So your file looks something like this. Change the settings to your liking. If you don`t know what you are doing, these settings are mine and should work just fine:
Code: Select all
# This is an example resource file for rTorrent. Copy to
# ~/.rtorrent.rc and enable/modify the options as needed. Remember to
# uncomment the options you wish to enable.

# Maximum and minimum number of peers to connect to per torrent.
#min_peers = 40
max_peers = 100

# Same as above but for seeding completed torrents (-1 = same as downloading)
#min_peers_seed = 10
max_peers_seed = 50

# Maximum number of simultanious uploads per torrent.
max_uploads = 15

# Global upload and download rate in KiB. "0" for unlimited.
download_rate = 0
upload_rate = 200

# Default directory to save the downloaded torrents.
directory = /home/rtorrent/download/

# Default session directory. Make sure you don't run multiple instance
# of rtorrent using the same session directory. Perhaps using a
# relative path?
session = /home/rtorrent/session/

# Watch a directory for new torrents, and stop those that have been
# deleted.
schedule = tied_directory,10,10,start_tied=
schedule = untied_directory,10,10,close_untied=
schedule = watch_directory,5,5,load_start=/home/rtorrent/watch/*.torrent

# Close torrents when diskspace is low.
schedule = low_diskspace,5,60,close_low_diskspace=100M

# Stop torrents when reaching upload ratio in percent,
# when also reaching total upload in bytes, or when
# reaching final upload ratio in percent.
# example: stop at ratio 2.0 with at least 200 MB uploaded, or else ratio 20.0
#schedule = ratio,60,60,"stop_on_ratio=200,200M,2000"

# The ip address reported to the tracker.
#ip = 127.0.0.1
#ip = rakshasa.no

# The ip address the listening socket and outgoing connections is
# bound to.
#bind = 127.0.0.1
#bind = rakshasa.no

# Port range to use for listening.
port_range = 9000-9008

# Start opening ports at a random position within the port range.
port_random = yes

# Check hash for finished torrents. Might be usefull until the bug is
# fixed that causes lack of diskspace not to be properly reported.
check_hash = yes

# Set whetever the client should try to connect to UDP trackers.
use_udp_trackers = yes

# Alternative calls to bind and ip that should handle dynamic ip's.
#schedule = ip_tick,0,1800,ip=rakshasa
#schedule = bind_tick,0,1800,bind=rakshasa

# Encryption options, set to none (default) or any combination of the following:
# allow_incoming, try_outgoing, require, require_RC4, enable_retry, prefer_plaintext
#
# The example value allows incoming encrypted connections, tries to start
# encrypted RC4 outgoing connections, but retries unencrypted if it fails.

encryption = allow_incoming,try_outgoing,enable_retry

# Enable peer exchange (for torrents not marked private)
#
peer_exchange = yes

# Enable DHT support for trackerless torrents or when all trackers are down.
# May be set to "disable" (completely disable DHT), "off" (do not start DHT),
# "auto" (start and stop DHT as needed), or "on" (start DHT immediately).
# The default is "off". For DHT to work, a session directory must be defined.
#Enabling DHT will give you more peers on public trackers, bit should not
#be enabled on private trackers as this will reduce speed and cause a privacy risk
#

dht = auto

# UDP port to use for DHT.
#
dht_port = 9009

#
# Do not modify the following parameters unless you know what you're doing.
#

# Hash read-ahead controls how many MB to request the kernel to read
# ahead. If the value is too low the disk may not be fully utilized,
# while if too high the kernel might not be able to keep the read
# pages in memory thus end up trashing.
#hash_read_ahead = 10

# Interval between attempts to check the hash, in milliseconds.
#hash_interval = 100

# Number of attempts to check the hash while using the mincore status,
# before forcing. Overworked systems might need lower values to get a
# decent hash checking rate.
#hash_max_tries = 10
Remember to open the entire portrange above in your router and forward it to the seedbox IP. If you plan on using SSH for remote administration (i.e. outside your LAN), you must also open port 22 in your router and forward it. If you don`t know how this is a good starting point: http://portforward.com/
Now that you have configured everything, log in as root
Code: Select all
suStart rtorrent as a daemon and use the new config file
Code: Select all
/etc/init.d/rtorrent startIf you want to check the status of your torrents, and assuming that your server is 192.168.1.10, you can see the rtorrent status screen from your computer. (You must first exit the current ssh session.)
Open the console on your computer and type
Code: Select all
ssh -t rtorrent@192.168.1.10 'screen -r'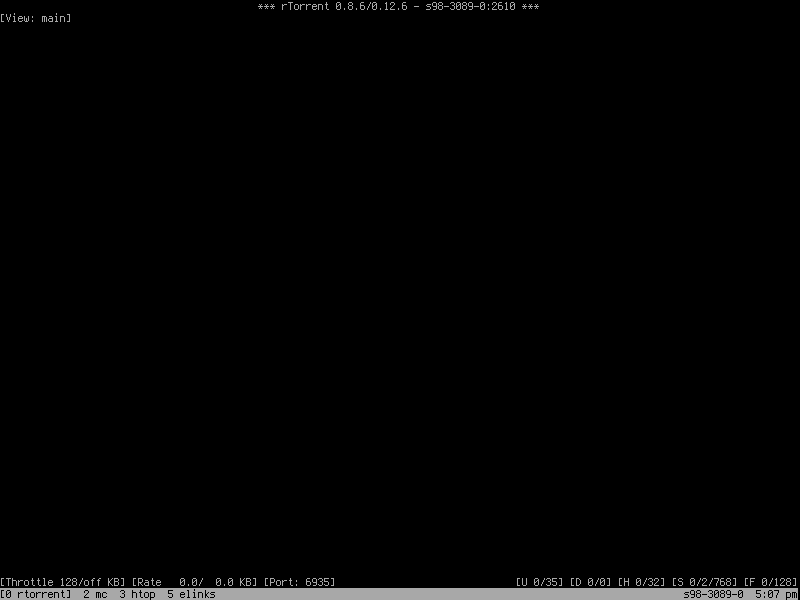
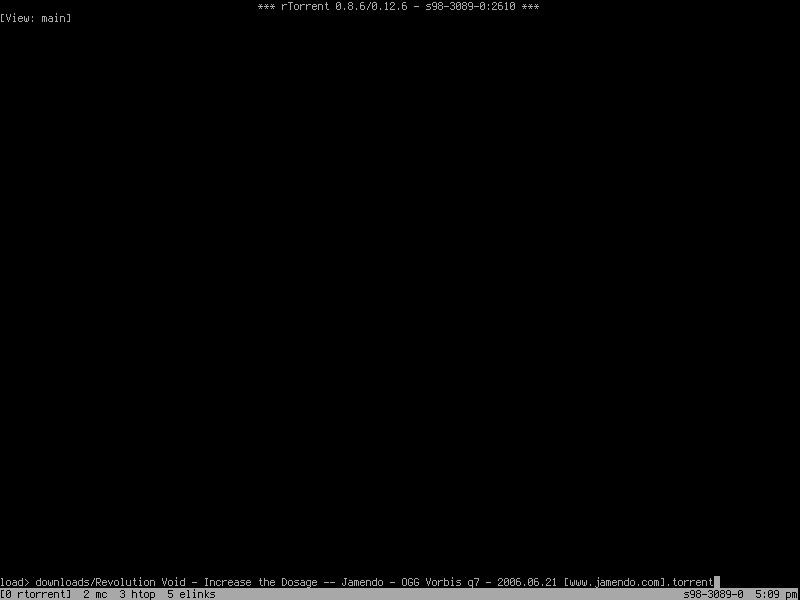
You can also add torrents manually. Just press enter and type in the location of the torrent
Now the torrent is added, but it won`t download until you tell it to. It is still maked inactive.
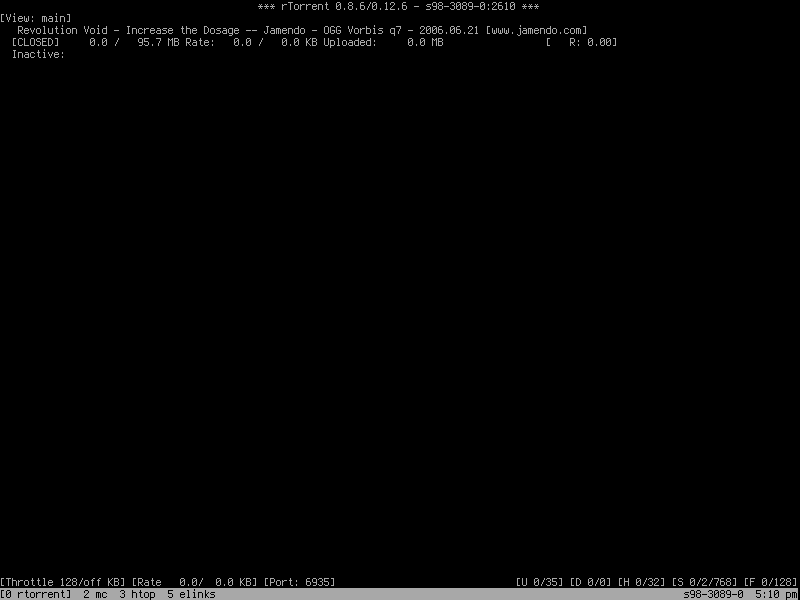
To activate it, use the arrow keys to highlight the torrent and start it by pressing Control+s
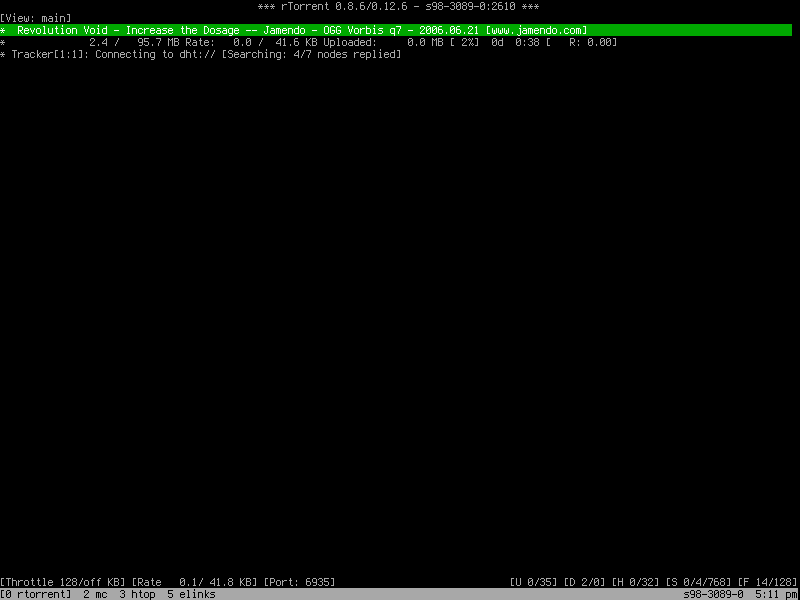
Now the torrent is moving.
There are some useful shortcuts to remember while using rtorrent
After you highlight a torrent with the arrow keys Up and Down, the arrow keys Left and Right gives more information about a particular torrent. To change the status of individual files (download or don`t download), press the spacebar on a highlighted file name.
If you have set a seed ratio, highlighting a torrent and pressing Shift + i will ignore default seed limits for this torrent.
Control + d will stop a download in progress. Pressing it again will remove a stopped download.
Control + s will start a stopped download
To increase the max upload rate, press a, s or d (a will increase with 1 Kb/s, s will increase it with 10 Kb, and d will increase it with 50Kb) To reduce, press z, x or c
To increase the max download rate, press Shift + a, s, or d. To reduce press Shift + z, x or c.
The finished files will be placed in /home/rtorrent/download/
To quit screen, press Control+a+d. (rtorrent will keep running on your server)
rtorrent will start automatically on boot and start seeding without any intervention.
Copying files to and from the seedbox
First we need to upload a torrent to /home/rtorrent/watch/ in the seedbox, and the download will start automatically. Once finished, we can copy the downloaded file(s) to the hard drive. To do that download Filezilla or any other FTP application that supports SFTP.
Assuming you want to use Filezilla, it is in the Debian repositories. (You can also use Filezilla for Windows and Mac.) You can install it in Debian with
Code: Select all
aptitude install filezillaHost = The IP address of the seedbox, i.e. 192.168.1.10
Port = 22
Server Type = SFTP
Logon Type = Normal
User = rtorrent
Password = password for user rtorrent
Press connect and then upload your torrentfile to /home/rtorrent/watch/
If you want you can follow the download using screen, and when everything is done, use Filezilla (or another suited FTP client) to transfer the downloaded file(s) from /home/rtorrent/download/
It is also possible to copy files from the CLI using the scp command:
To copy a file from your machine to a remote machine:
Code: Select all
scp /path/file user@host:/pathCode: Select all
scp user@host:/path/file /pathSeeding a torrent
As explained above, to download a torrent, drop the .torrent file in /home/rtorrent/watch/
To seed a torrent, follow these steps:
1. Make a .torrent file on your computer.
2. Upload the data files to /home/rtorrent/download/
3. Upload the .torrent file to the tracker
4. Upload the .torrent file to /home/rtorrent/watch/
… and you are seeding the file.
Maintaining and securing the seedbox
Security updates
The server, just like your regular computer, needs maintenance. It needs to have the latest security updates. Of course, if you want, you can log on using SSH and run
Code: Select all
aptitude update && aptitude safe-upgradeBut if you are really lazy or have better things to do there is an easier way out. How about getting the server to automatically download and install all the security updates on its own? If that sounds good, type
Code: Select all
aptitude install unattended-upgradesCode: Select all
dpkg-reconfigure -plow unattended-upgradesThe server will now keep itself up to date without you having to do anything.
But if the kernel has been upgraded you must still reboot the server to make the new changes take effect.
Fail2ban
Since you are running a server with SSH, there are probably already bots run by sociopaths trying to brute force into your seedbox already. As long as you made a strong password like I told you, you`re fine. But if you made login=root and password=root, your seedbox could already be cracked by now - if port 22 is open to the web. Changing the standard SSH port will make most of the bots move on to greener pastures, but if someone targets your seedbox, all they need is a portscan to discover what port you are using, and then try to brute force it.
With fail2ban you can make your own rules when it comes to failed password attempts. Say, if someone makes a certain number of failed password attempts for SSH within a certain amount of time, they will get banned for a certain amount of time. If fail2ban discovers a given number of failed password attempts, it will make a new rule in the powerful firewall iptables (installed by default).
You can list existing rules in iptables by typing
Code: Select all
iptables –LYou`ll probably get something like this
Code: Select all
 Chain INPUT (policy ACCEPT)
target     prot opt source               destination

Chain FORWARD (policy ACCEPT)
target     prot opt source               destination

Chain OUTPUT (policy ACCEPT)
target     prot opt source               destination
You can install fail2ban with
Code: Select all
aptitude install fail2banLet`s open it with
Code: Select all
nano –w /etc/fail2ban/jail.confCode: Select all
[DEFAULT]

# "ignoreip" can be an IP address, a CIDR mask or a DNS host
ignoreip = 127.0.0.1
bantime  = 7200
maxretry = 4Code: Select all
[ssh]

enabled = true
port	= ssh
filter	= sshd
logpath  = /var/log/auth.log
maxretry = 4
This means that if there are 4 failed password attempts from a certain IP, the IP will get banned in iptables for 7200 seconds.
If you are not checking the root mailbox, change it from “true” to “false”.
Save and exit when you are done.
Check if fail2ban is running by typing
Code: Select all
/etc/init.d/fail2ban statusCode: Select all
/etc/init.d/fail2ban stopCode: Select all
/etc/init.d/fail2ban startAccessing your seedbox from a remote location
So far we have concentrated on administering the seedbox from a computer at home. But if you want to use your seedbox when you are on holiday, or you left your seedbox connected in your friend`s house in Sweden – who has a 10 gigabit connection – you need to be able to transfer files to and from a remote location.
Assuming the seedbox is up and running, you just need the external IP to connect to your seedbox. The problem is that now and then the IP is changing, and if it is changing while you are on the other side of the planet, the old IP won`t work.
However there is a way to circumvent this – by getting a dynamic DNS. That means you`ll have a hostname instead of a changing IP address. It works like this: Your computer will notify the DNS server of its IP at given intervals, so you can always use the same hostname for login – even if your IP is changing.
There are several providers of free DNS services, for instance http://www.no-ip.org
If you want to use it you need to register for a hostname, make an account and (on the web page) attach the hostname to your username.
After that install the noip2 package on your server
Edit 18.08.11: You may have to grab this package from Sid/unstable. (It has no dependencies.)
Code: Select all
aptitude install noip2Code: Select all
dpkg-reconfigure noip2To SSH into your seedbox you still use ssh user@hostname, e.g. like this, but with letters replacing numbers:
Code: Select all
ssh rtorrent@myshinynewseedbox.no-ip.orgGood luck!
I`d love to hear your experiences from this tutorial and likewise if there are tips, tricks or errors I need to be aware of.
That`s it. Happy torrenting!
Please discuss here: http://www.debianuserforums.org/viewtop ... f=24&t=293
Edits:
25.02.11: Updated for Squeeze
Credits:
http://www.howtoforge.org/perfect-serve ... ispconfig3
http://forums.bit-tech.net/showthread.php?t=129569
http://www.the-art-of-web.com/system/fail2ban/
http://www.bytetouch.com/blog/linux/how ... on-debian/
http://kmandla.wordpress.com/2007/05/02 ... ike-a-pro/
http://geekfeat.com/2010/06/howto-setup ... orrenting/